Home
Aerobatics for Electric Airplanes
by John McNicol I started flying R/C in 1969 at the Toronto club in Scarborough. Almost immediately came under the influence of Ron Chapman and started learning aerobatics. Spent most summers in the '70s competing at the various pattern contests around Ontario. Eventually flew at the Expert level. Left hobby for 12 years. Now back in and currently (if you'll pardon the expression), only flying electric. Why fly aerobatics? Aerobatics can be characterized as "Sport", "Hotdogging" and "Precision" (Flying defined manouevres in a precise manner). Why learn "precision"? Because it's fun, interesting and hones flying skills. Instead of just flying aimlessly we develop a purpose for each flight. Can electric airplanes fly precision manouevres? Anyone who has watched Keith Shaw fly knows the answer to that. But can the average pilot fly the manouevres? Again the answer is yes, with two provisos - you need a suitable airplane and you need the desire to practice. If you can take-off, fly and land a sport plane, you already have all the basics you'll need. We can't all be Ivan Kristensen or Hanno Pretner but we can all learn to fly pattern type manouevres respectably. What suitable planes are available? The models being used today in F3A competition are quite large, about 2 meters by 2 meters and usually with 1.20 cub. in. engines. These airplanes are graceful and remarkably quiet, almost like electric! This size would seem to be just beyond the practical limit for electric airplanes at the present and in any event outside the scope of this discussion today. What we need are good aerobatic models using motors from the Speed 400 to the Astro 40 or the Aveox 1412 range. 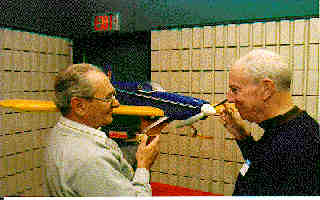 (Don Guthrie and John McNicol with Don's Sportster 40)
Starting with the Speed 400 or Astro 05 size about the only kit that can be bought off the shelf in Canada would appear to be the Great Planes ElectroStreak. This is a really good flying machine and by boosting the power up from 7 cells to 10 and using a 15 size motor, the performance is excellent. However if good knife edge capability is desired a bigger rudder needs to be fitted. New Creations R/C has a kit for a model called the "Apache" which looks good in the picture but I haven't seen one fly. If you like to build from plans there is the "Fer de Lance" designed by John Bech-Hansen. Rob Pike has built this airplane and was very pleased with the performance. Also from the Jan/Feb 1995 issue of EFI is a model callled the Volant which has all the right ingredients. Moving up the scale a bit, New Creations has kits for a couple of sports aerobatic planes which would seem to be in the Astro 25 range of power requirements. One is the Schneider Sport "60" E and the other the "Akro Pro 25E" In the Astro 40 or equivalent power range Hobby Lobby sells the"Flame"which is a low winger of 682 sq.in. They recommend a Mega S5 or 7 and 16 cells with a total weight of 96oz. I've seen this one fly in the hands of Dave Grife and it looked very good. A plane I like the look of was featured in the Jan/Feb 1996 issue of EFI and is called the "Hammer E" designed by Australian Paul Rossiter. This is the only tricycle gear aerobatic model I've seen published. It was originally designed for a Graupner Speed 700 turbo with an Olympus 2.3:1 belt reduction unit. I'm sure the plane would fly well on an Astro geared 25 or even 40. No kit, plans only. Finally, Model Air-Tech has a mid-wing sport pattern plane they call the "Acrovolt" which is 600 sq. in., 60" span , weighing 6 lbs. This one is designed around the Speed 700 and the H 1000 belt drive. It runs on 16 cells with a 12 x 8 prop. This one too is plans only. So - there is choice available. Building the airplane There are some considerations which should be given special attention when building an aerobatic airplane. These apply to all models but are especially important with aerobatics.
After the initial test flights and setting trims so that the model flies straight and level hands-off, it's time to get more particular. First of all put the model on your bench or a table and check what trim you had to put in to achieve straight and level hands-off flight. If, for instance ,you have some left or right aileron trim perhaps the wing is slightly warped. Try to remove this warp. Also eyeball the relationship of the wing to the tail. If it's not correct, shim the wing or tail as necessary. If your elevator is in two halves, check to make sure that they are parallel to each other. If the wing and the alignment are perfect then it may be that the motor thrust line is at fault. If you have right trim in the ailerons then perhaps some right thrust is required. Now take a look to see if you have put in elevator trim. If you have, then check that the location of the C.G. is where it's called for on the plans. If this seems to be correct, then again check the motor thrust line, this time for up and down. If you have some down elevator trim, then the motor should probably be given some down thrust. If up trim, then remove any downthrust. If you have made any adjustments as described above be sure to neutralize the trims on your transmitter before the next flight. On your next test flight you should only require small adjustments to trim settings to achieve hands-off straight and level flight. Now we want to check if our C.G. is really where we want it. Your plane will probably fly quite well within a fairly wide range of C.G. location. Further forward and the model will groove better, but may not spin. Too far back and the model becomes overly sensitive. Since you can't check the spin ability until you learn how to spin you can try this method. Put the model into a left or right turn. The wing should lay over almost perpendicular to the ground using aileron and elevator. Watch closely. If the nose drops during the bank you are nose heavy. If the nose rises, you are tail heavy. Keith Shaw details a more sophisticated method in the 1992 symposium book on pages 41 to 43. When you are happy with the C.G. location you can permanently locate the motor battery. The final check we should make is trimming for a good vertical climb. Fly straight and level into the wind at full throttle. As the plane flies past you, pull up to a vertical climb. A well trimmed airplane will climb without control input until it runs out of steam. Of course you will have to do this a few times to make sure you haven't pulled up when the wings weren't level or that a gust of wind didn't affect the model. If the model consistently falls off either left or right then that wing is probably heavier and you should check the balance again. If that's not it then you may still be having torque problems from the motor and further thrust line adjustment is required. If all of this seems like a lot of work, it is. But the result should be a model which is much easier to fly and which will perform the manouevres with less effort on the pilots' part. Flying the Manoeuvres There are many, many manoeuvres flown in competition and if you want to know what they are, and what the judges look for when scoring them , get a copy of Precision Aerobatics Rules form the MAAC office. They only cost a few dollars and cover all the classes from Sportsman to F3A. It would be impossible to describe all the manoeuvres available, even if I knew them all but we can examine the basics. The basics are of course the loop, the roll and the stall turn. Before tackling any aerobatics we should set the control surface movements. If you have dual rates on your transmitter we are talking here of low rate. Set the ailerons so that three horizontal rolls take about 5 seconds. Of course if you are just learning the manoeuvres, then it might be a good idea to get someone more proficient to do this! Adjust the elevator to give a loop as large as the model will do comfortably. High rates can be set for 25 to 50% more throw. These throws should give you a model that is not overly sensitive, yet will be able to snap or enter a spin on high rate. The basic requirement of a loop is that it be round, not oval, and flown at a steady speed. Enter with the wings level at full throttle. Pull back gently. Just before you reach the apex of the circle, release the up pressure slightly and cut back the throttle to about 50% so that you kind of float over the top. Maintain the roundness of the circle until you arrive back exactly where you started and fly out straight and level. If you are doing two or more loops, advance throttle as you start to climb again and try to follow the exact path of your first loop. Consecutive loops should be superimposed on each other. The roll is also started from straight and level. Apply full left or right aileron ( you have already set your roll rate) and as you approach the inverted position give a little down elevator releasing almost immediately. This will keep the nose from dropping. For your first rolls you may wish to start them from a slight climbing attitude. Consecutive rolls are just a matter of timing the application of down elevator. Ideally three consecutive rolls would remain on a horizontal string and take from 5 to 6 seconds to complete. The next manoeuvre you should try is the stall turn. Fly straight and level into the wind. Pull up vertically and climb for about 50'. Start to reduce throttle to about 25 %. Just before the model stops climbing give full left or right rudder (away from the flight line). The model should rotate about it's wing tip and descend on a parallel line to it's climb. Exit should be at the same height as the entry but in the opposite direction. These are the basics of aerobatics. If we have enough time today we can talk about the slow roll, Cuban 8, outside loops, spins and other more complicated manoeuvres. If you really get keen on aerobatics or pattern flying you'll find that your skill level will automatically improve as you discipline yourself to fly more accurately. Apart from the MAAC rule book you might find Dave Patrick's "Aerobatics for Everyone" a useful guide.
|
||||